Tools Required :
- Philips #2 Screwdriver
- 6mm hex bit with extension (6mm Allen key)
- Adjustable wrench
- Power down Roaster, unplug ethernet and power cable, remove the rear skin.
- Use a 6mm allen screwdriver to open up the rear extrusion. Swing the panel out and open. Place the bracket and screw aside.
- Swing of the extrusion from the right side like a door.
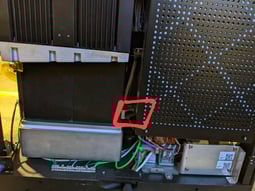
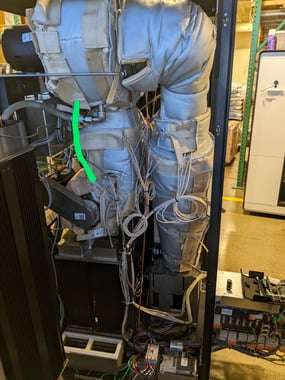
- Follow the green highlighted wire labeled Blower TC to the thermocouple on the roaster.
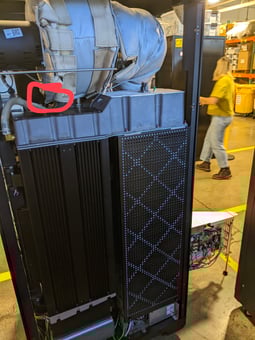
- Locate and remove the old thermocouple from the roaster.
- Transfer the old compression nut and ferrule to the new thermocouple. Match the length of the bend from the old thermocouple to the new.
- Install the new thermocouple. Plug the new thermocouple into in.
- Reassemble machine, power on.
- Clear any lingering thermocouple alarms.
- Roast