Tools Required
- Philips #1 Screwdriver
- Torx T10 Screwdriver/bit
- Metric allen key/bit set (incl 2mm, 3mm, 4mm, 5mm)
Parts Required:
| Qty | Part Number | Part Name |
| 1 | 242-00054 | TOUCHSCREEN, 10.1 IN, SR1 |
Process:
- Remove the Autoloader (if present). See this guide.
- Remove the left and right side panels from the Roaster.
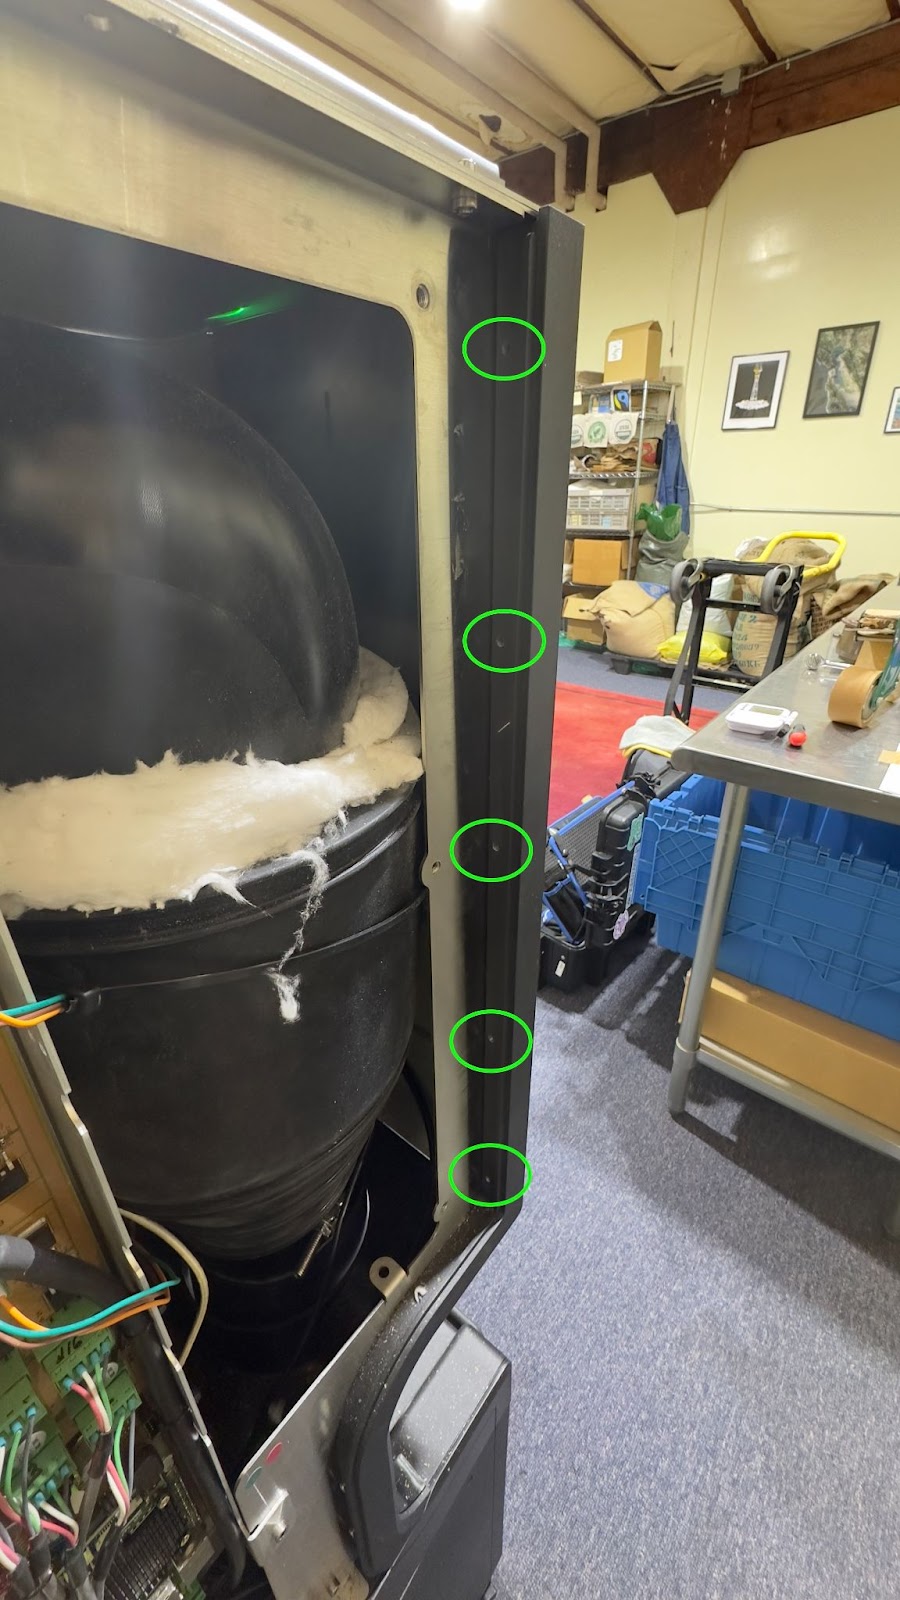
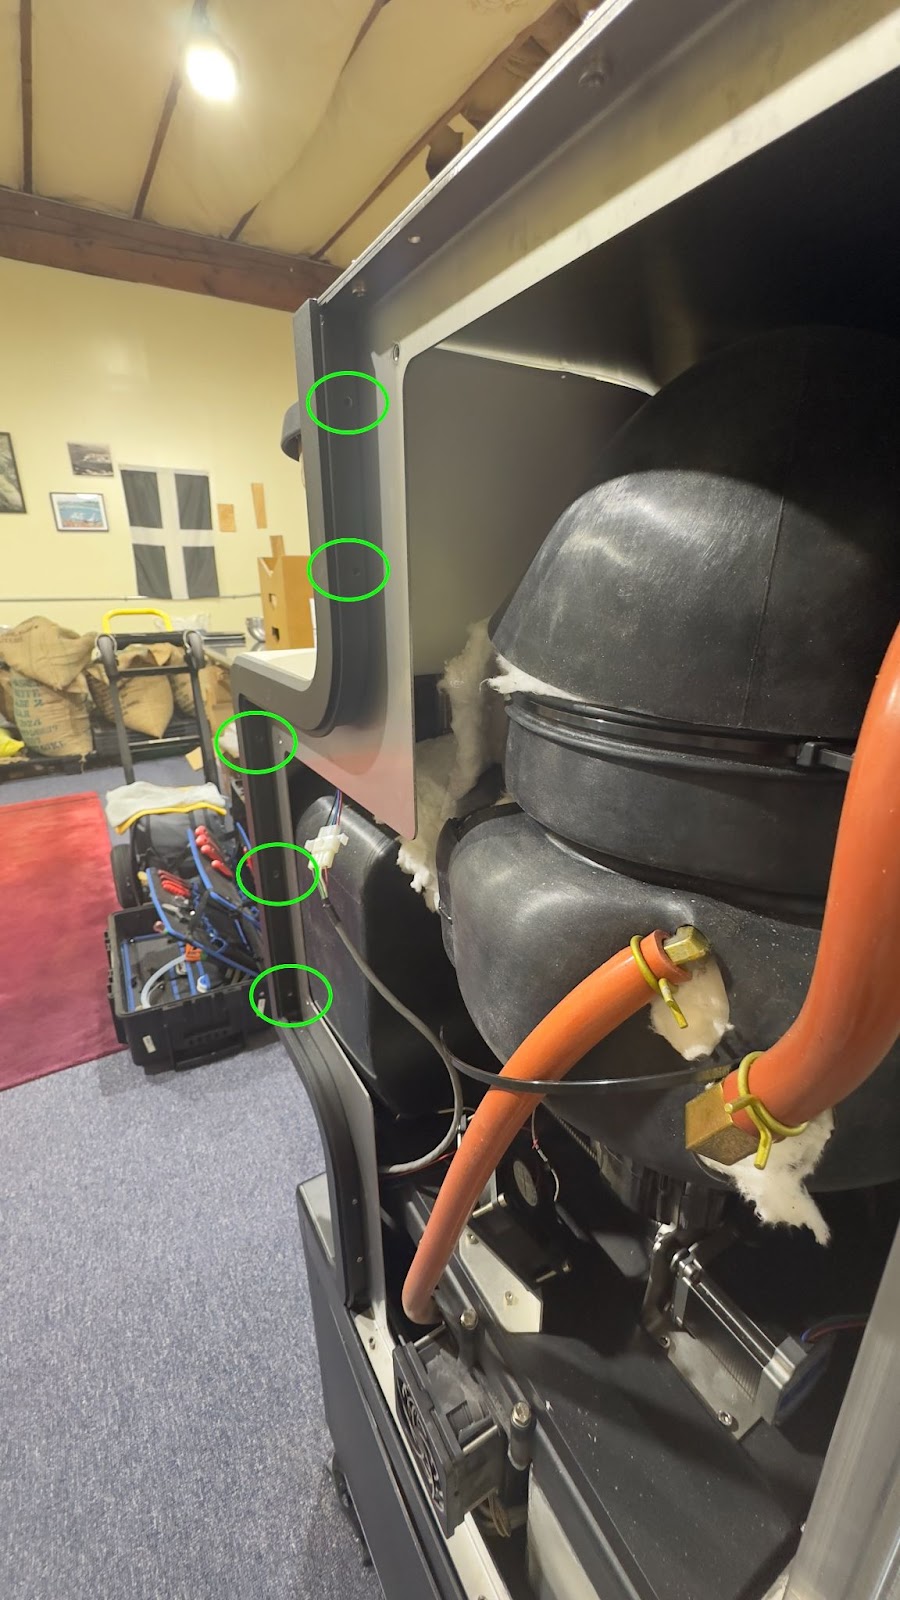
- Along the left side of the roaster remove the 5 Allen screws securing the front panel to the frame of the roaster.
- Along the right side of the roaster remove the 5 Allen screws securing the front panel to the frame of the roaster.
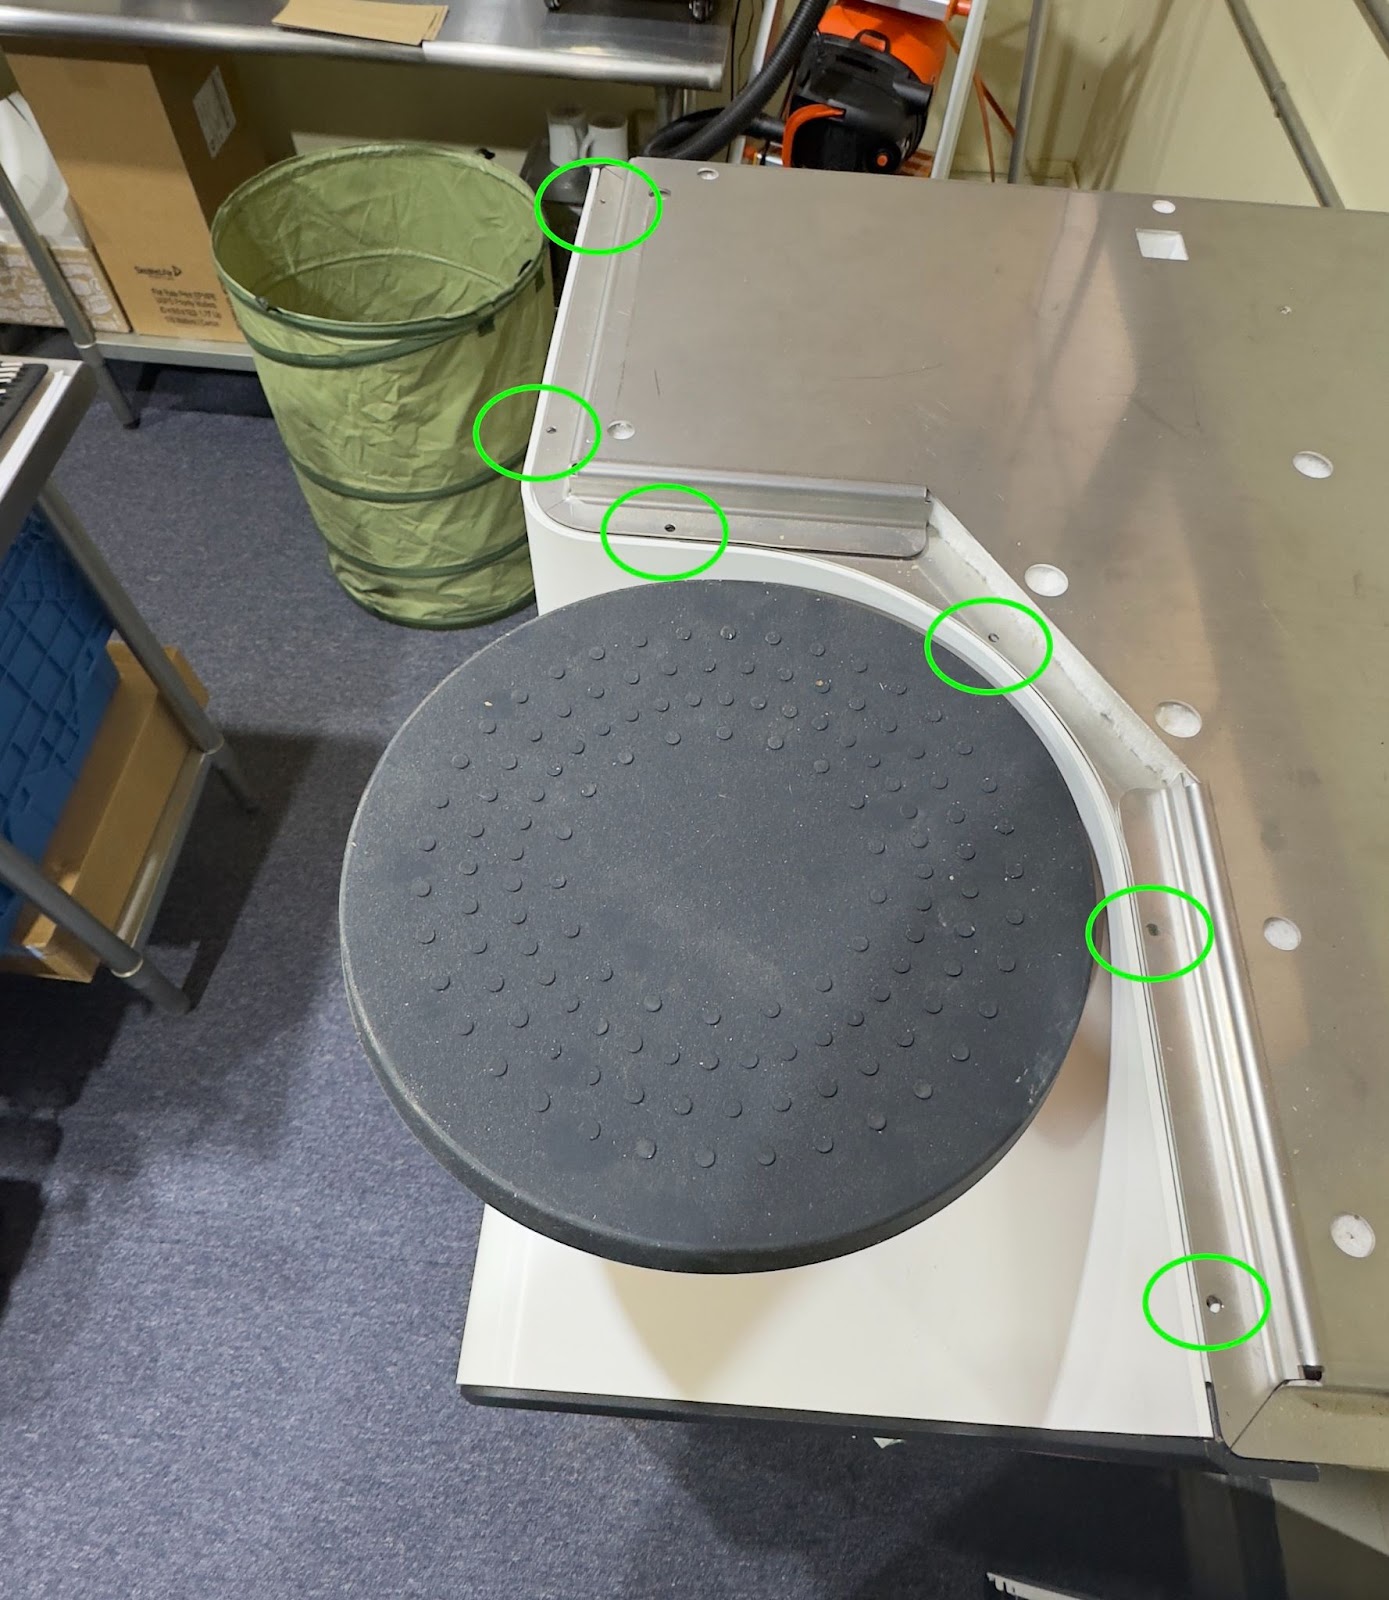
- Remove the six screws along the top of the roaster. These are either T10 or a #1 phillips.
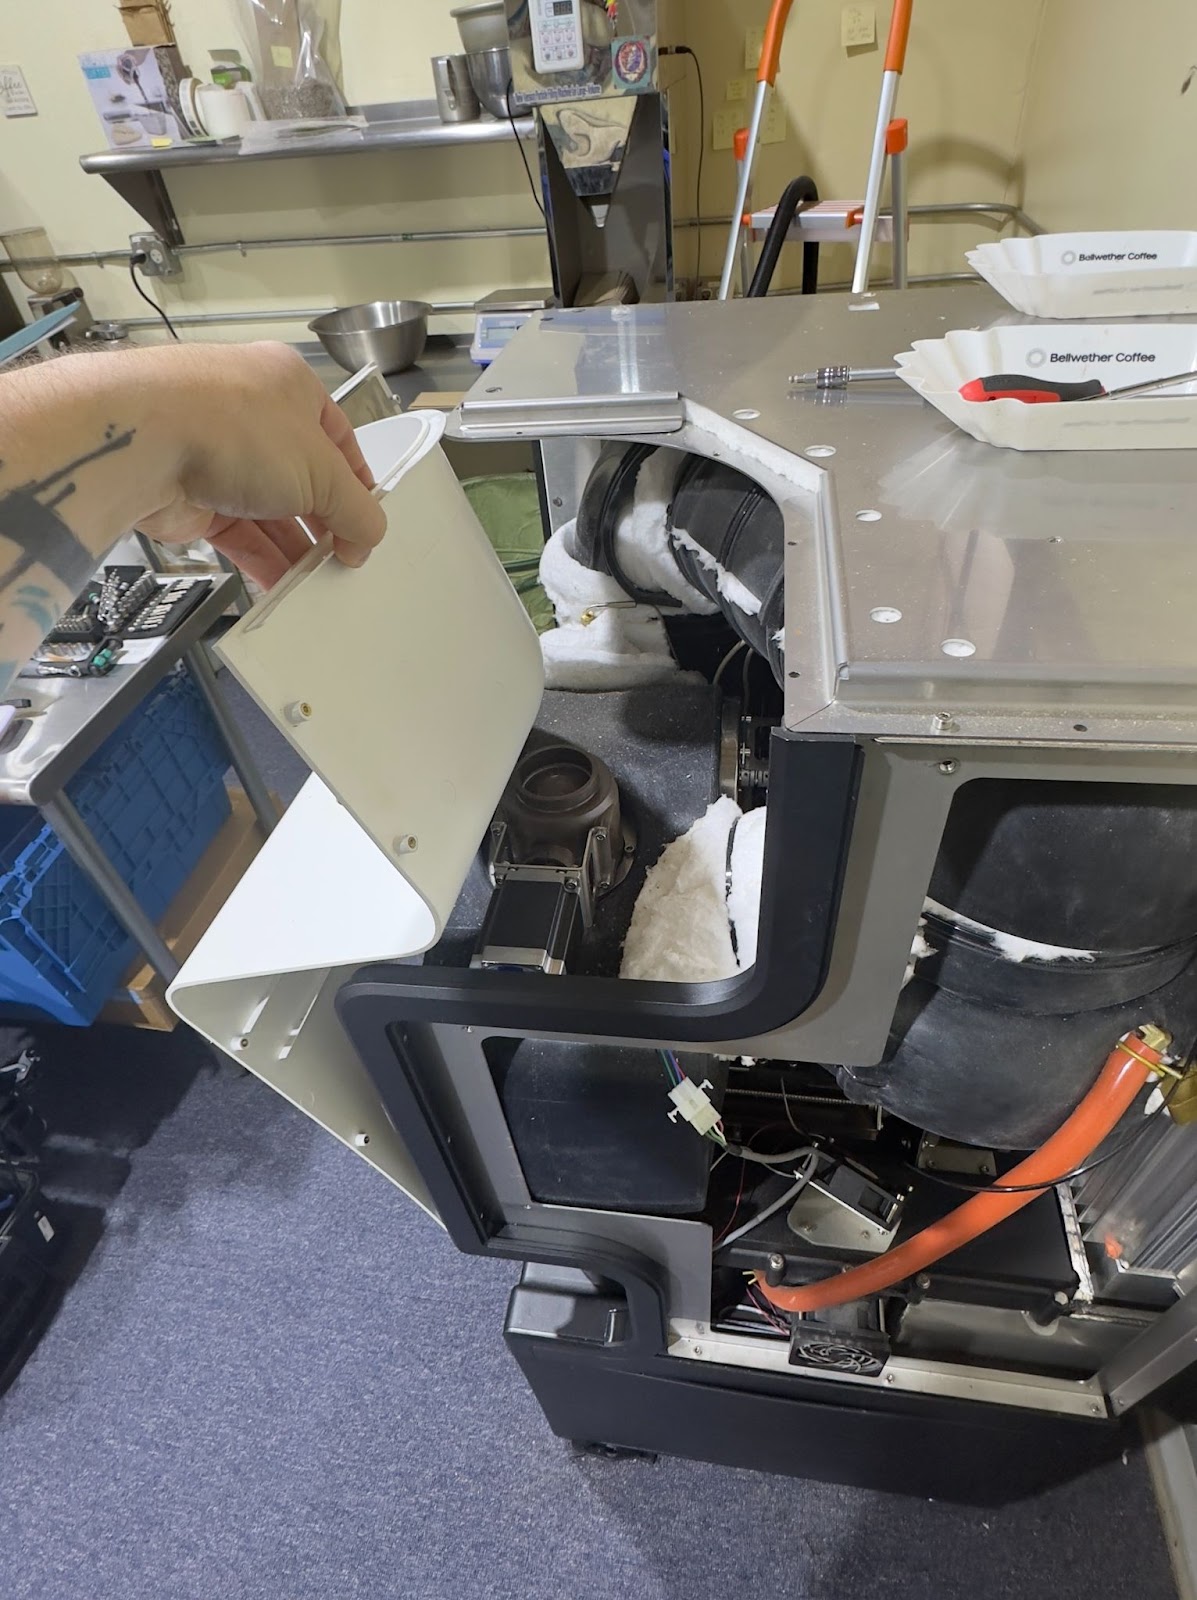
- Pop the front panel free from under the lid and pull it forward. Use a chair to help support the front panel as it leans forward.
-
Locate the back of the touchscreen. Remove the four screws to release the cover.

- Disconnect the HDMI and USB-Micro cables (in green below) from the bottom of the screen by widening the silicone supports and pulling downward.

- Carefully disconnect the screen from the front panel by removing the 6 screws (circled in blue below.) The silicone trim piece may fall off during this process--make sure to set aside for reassembly.

- Place the screen on a soft surface and remove from the bracket by removing the four circles noted in orange below:

- Replace the Touchscreen with your new one. Make sure to remove the plastic film on the new screen and confirm the cable supports are aligned in the same orientation on the new screen like below.
- Work backward through this process to refit the screen to the bracket, replace the silicone trim piece, refit the screen to front panel, reconnect the HDMI and USB cable to the bottom of the screen, replace the back cover to the assembly, refit all panels and the Autoloader.
- Turn the roaster on to confirm screen function and test.