Tools required :
- T10 Screwdriver
- #1 Phillips Screwdriver
- #2 Phillips Screwdriver
- metric Allen key set
Process :
- Remove the Autoloader. See this guide.
- Remove the right and left panel of the roaster. Set aside.
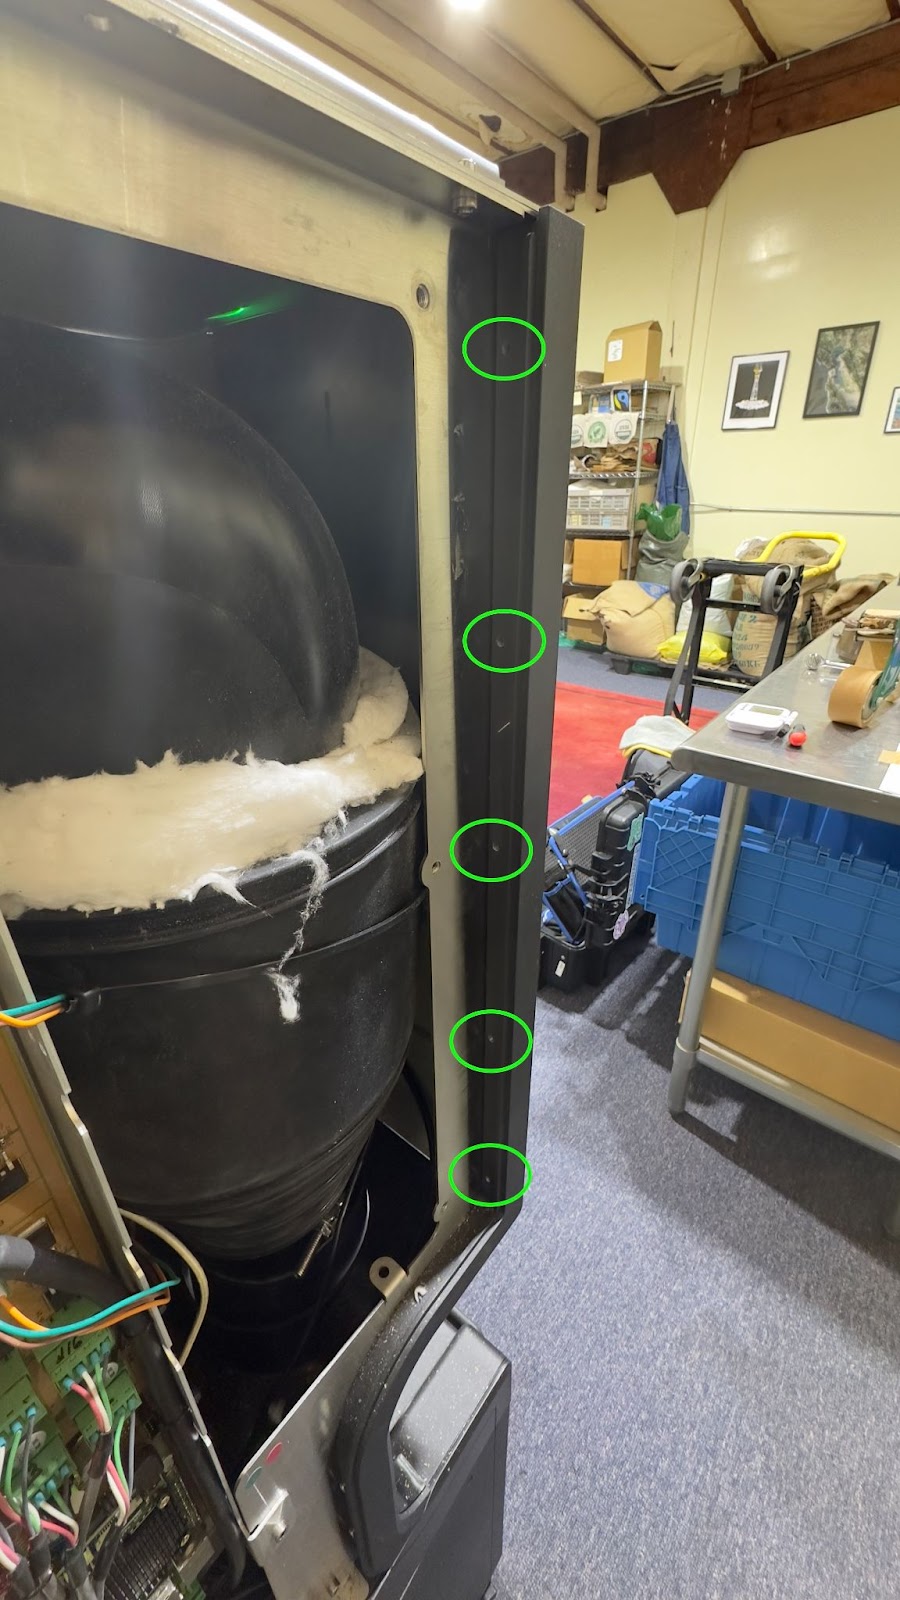
- Along the left side of the roaster remove the 5 Allen screws securing the front panel to the frame of the roaster.
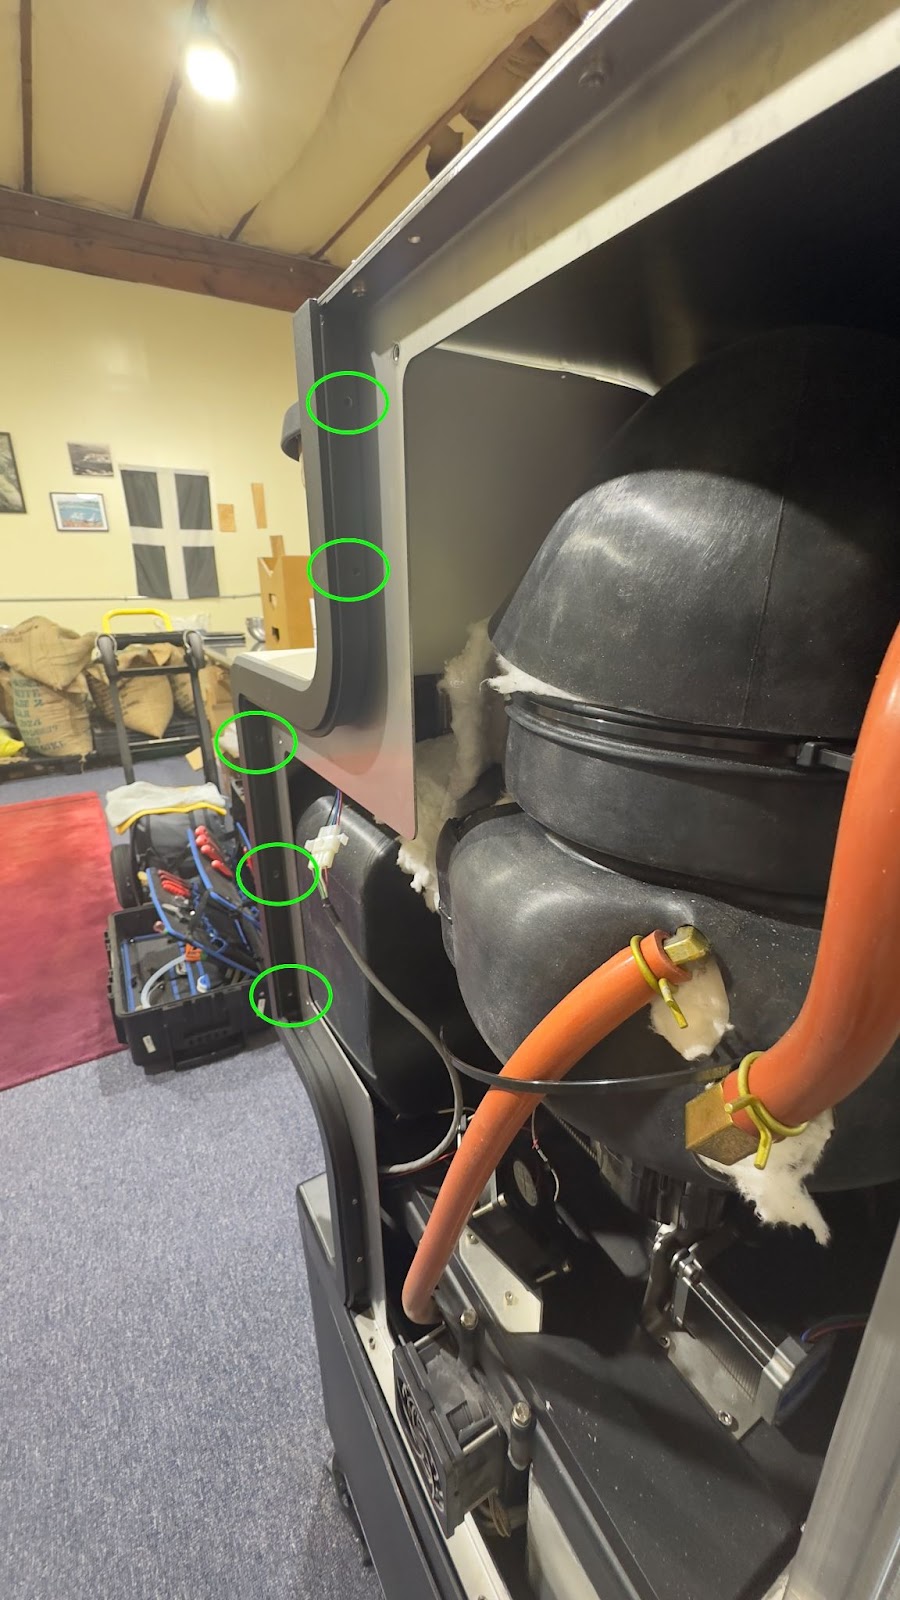
- Along the right side of the roaster remove the 5 Allen screws securing the front panel to the frame of the roaster.
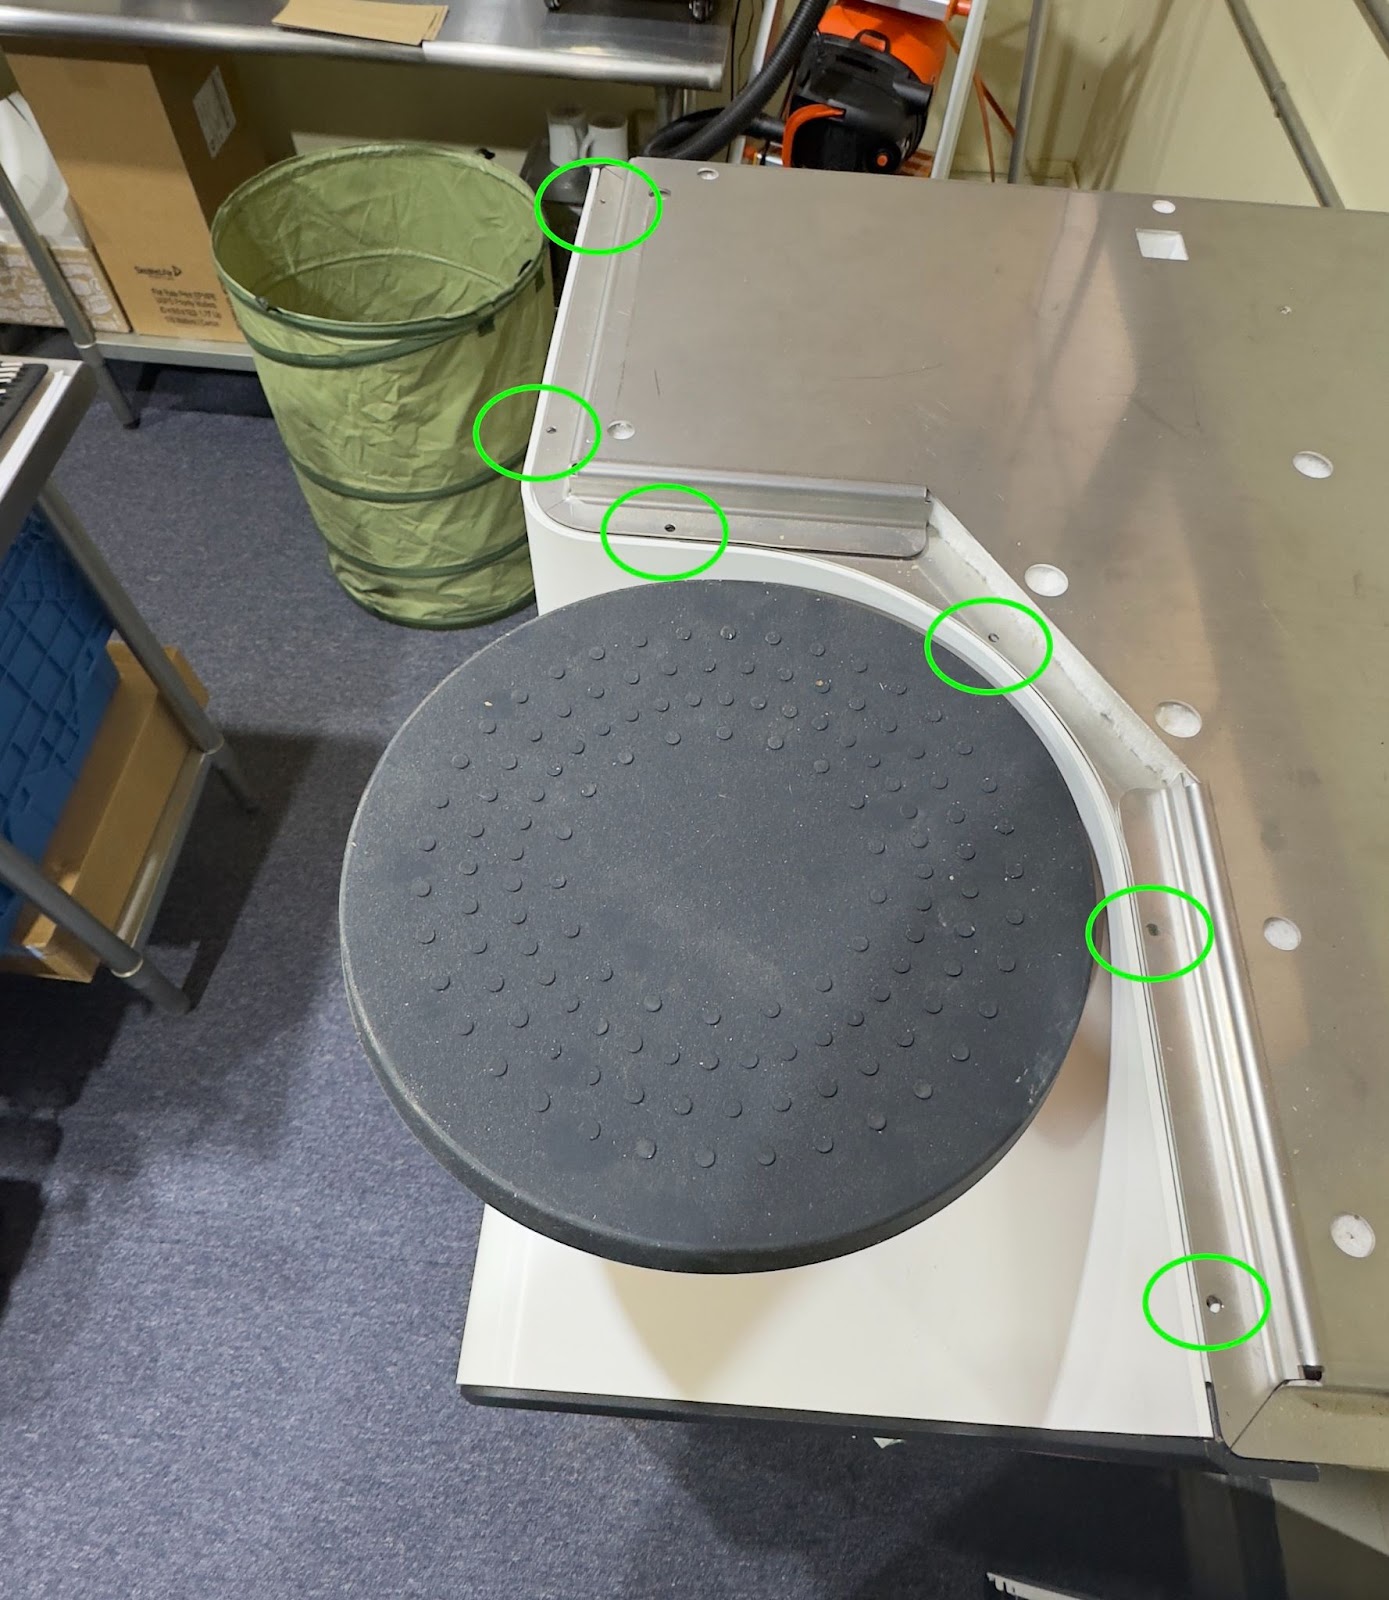
- Remove the six screws along the top of the roaster. These are either T10 or a #1 phillips.
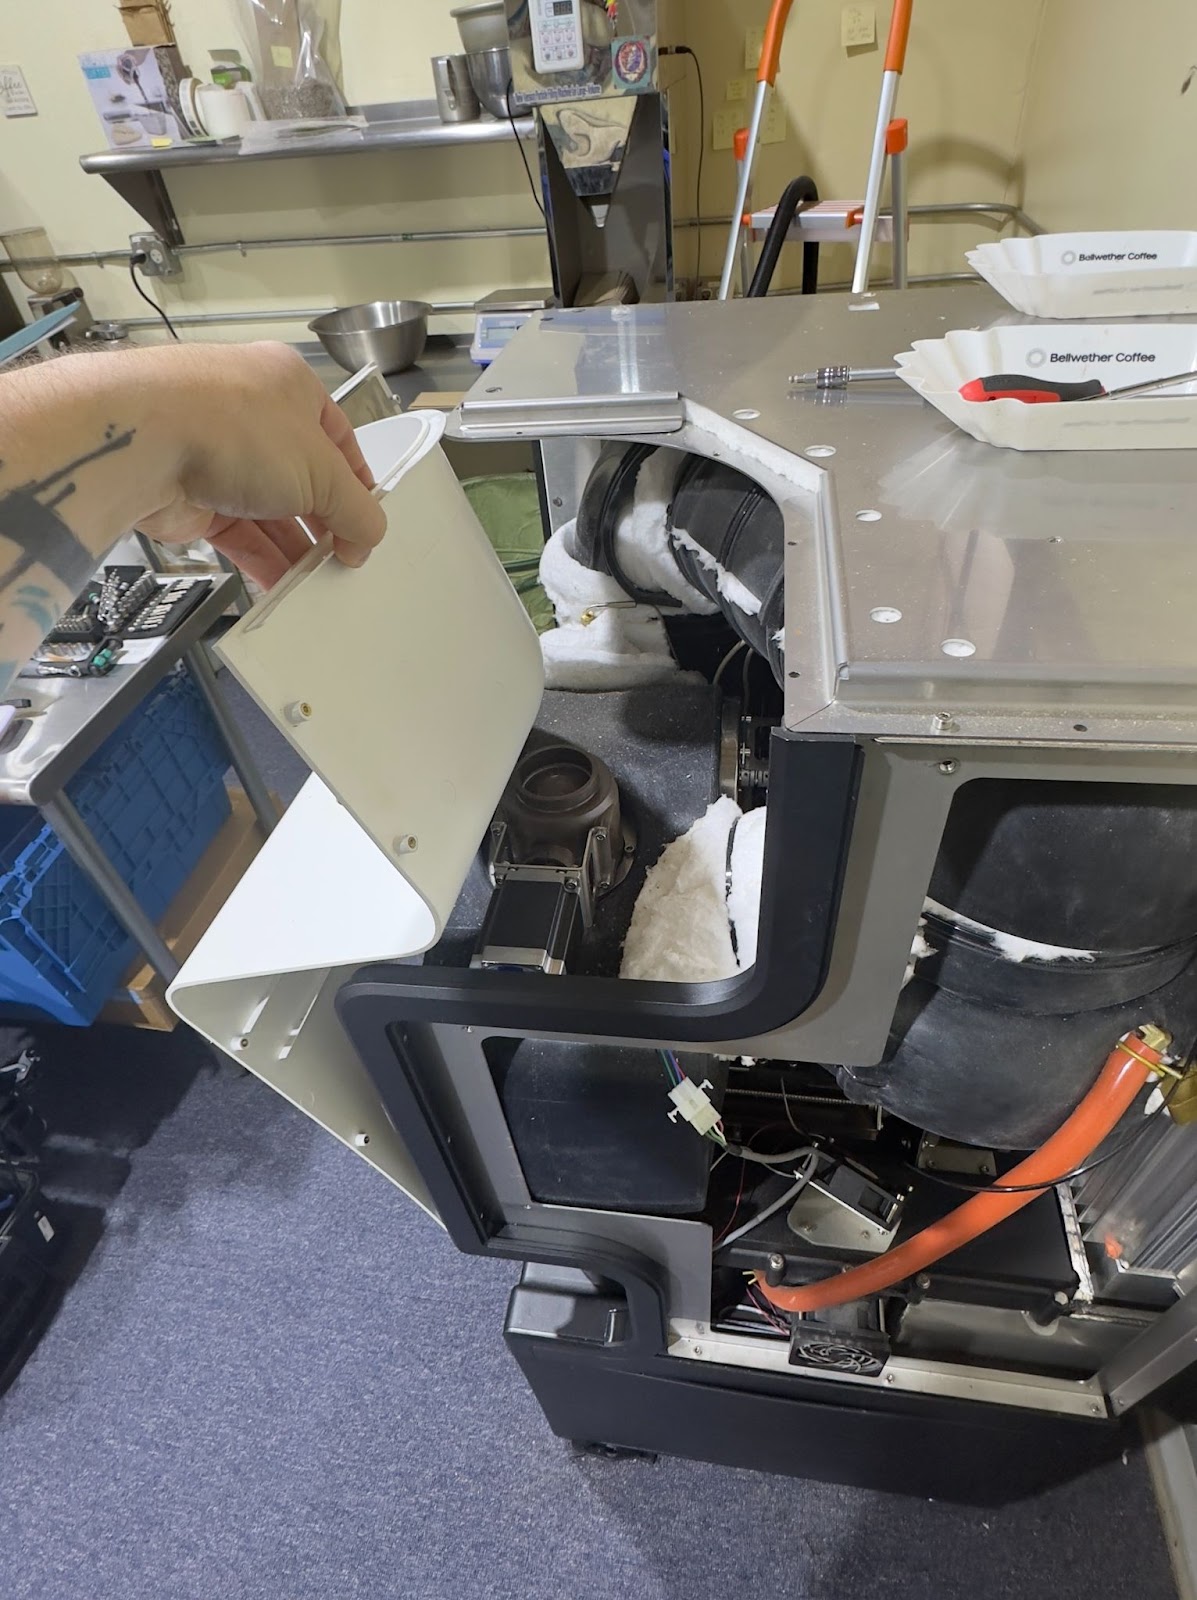
- Pop the front panel free from under the lid and pull it forward. Use a chair to help support the front panel as it leans forward.
-
Remove the six Allen screws holding the bean load in place. Remove the Bean load and set aside. Support bottom of the bean load.

- Remove the motor bracket from the bean load assembly.

- The new stem does not come with a new set screw, remove the old stem from the motor bracket and remove the set screw from the stem.
-jpg.jpeg?width=241&height=428&name=PXL_20250404_144142053%20(1)-jpg.jpeg)
- When installing the new stem onto the motor make sure the screw is over the flat on the motor shaft.


- Reinstall the motor to the bean load, reference this guide if you have any issues.
- Reassemble roaster and test.