- Remove the left and right side of the roaster.
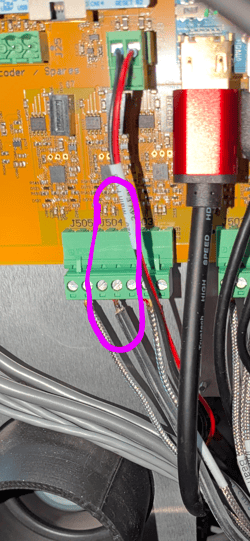
- With the small flathead screw driver undo the wiring (Red in pin 3, Yellow in pin 4) from the green Phoenix connector J504. Located on the bottom of the control board on the left hand side of the roaster.
- On the right side of the roaster use an adjustable wrench to loosen and remove the compression nut on the bean thermocouple.
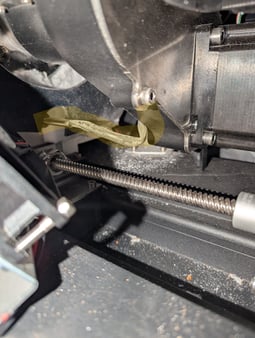
- With the compression nut off, pull the probe out of the drum, there will be a small Teflon isolator that comes out with the probe.
- Gently pull the wiring to the right side of the machine, watch out for any snagging and take your time.
- With the probe removed from the machine remove the isolation materials from the wiring and the probe.
- Place the compression nut on the probe, then install the isolation material onto the new probe and wiring.
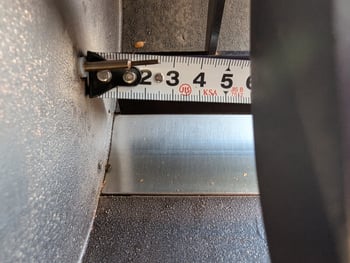
- Insert the new probe into the drum, the depth of the probe into the drum should be around 23-24mm.
- Tighten down the compression nut on the probe locking it in place.
- Run the wiring through the machine exiting under the control board.

- Reinstall the wiring onto the green connector at J504. If the color of the new wires differ from the existing Thermocouple as in the image below, replace the yellow wire with the red-striped and the white wire with the red.

- Turn the machine on and run a hot test.
English