Tools:
- T10 torx screwdriver/bit
- #1 Phillips screwdriver/bit
- #2 Phillips screwdriver/bit
- Metric set of allen keys
- side cutters
- Small adjustable wrench
- zip ties
Parts:
- 466-00111 Heater 4kw
- 452-00070 4" Graphite gasket
Process :
1. Shut machine down and unplug from the wall.
2. Remove the Autoloader from the top of the roaster. See this guide to remove the Autoloader
3. Remove the top of the roaster. 

4. Disconnect the top of the steam tube.
 5. Remove the carbon and HEPA filter to expose the filter box housing. If screws are present here remove them.
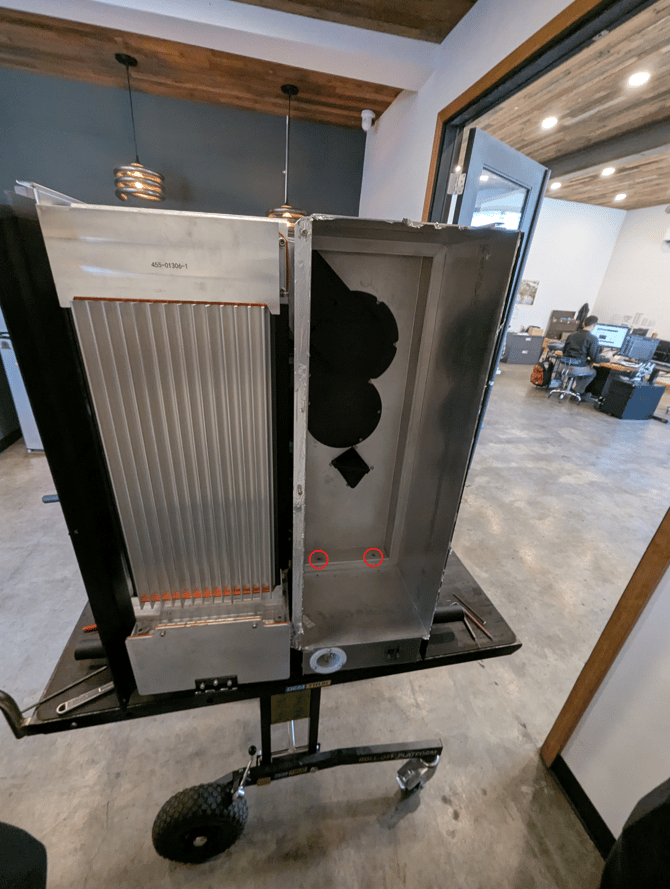
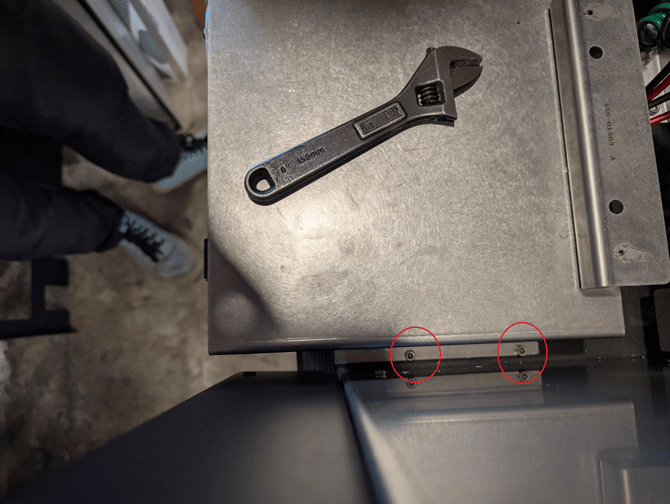
6. Remove the 5mm screws located on either side of the heat exchange.

7. Unplug the exhaust fans from the board. J23 and J29.
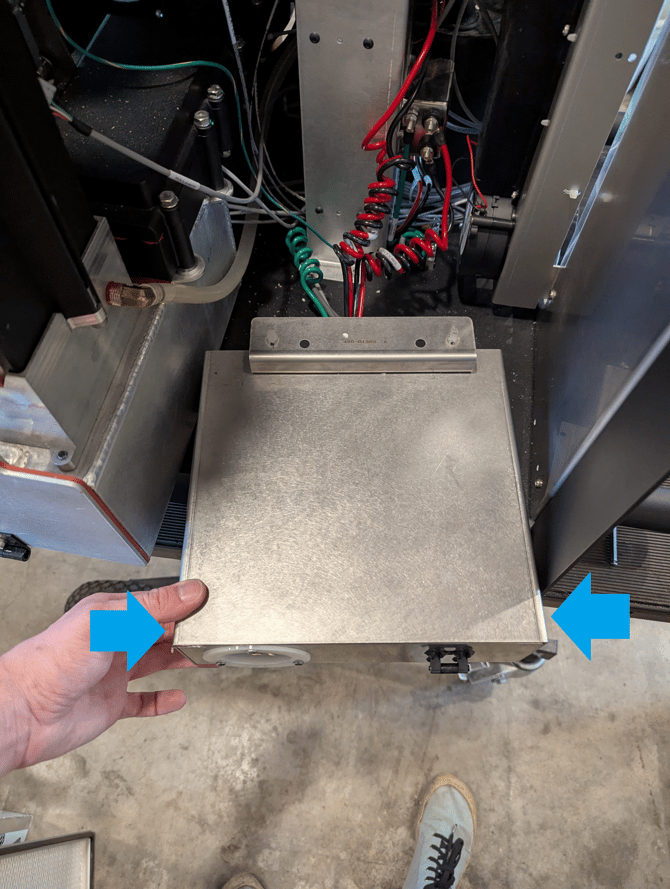
8. Lift the filter box out of the roaster to expose the high voltage box.

9. Remove the four 3mm screws (in red) holding the high voltage box down to the base plate, then remove the four 2.5mm screws (in blue) on both sides of the high voltage box.
10. You now have access to the high voltage box. If you are replacing a heater, you must always inspect the Current Sense board as it is at risk during a heater failure. If the board looks burnt, fried, or damaged, replace the Current Sense board (circled in red below). 
11. Disconnect the heater at the terminal mounted on the transformer. 
12. Cut any zipties to free the disconnected wires so they can be pulled out with the element.
13. Cut the zip ties holding the silicone sleeve for the insulation for the heater and the transitional duct to the right of the heater. Note: Cut a slit in the silicone sleeve from the edge to the hole the thermocouple protrudes through (green arrow points in direction of the probe). Remove silicone sleeves.  14. Carefully remove the insulation and set to side.
15. Remove the thermocouple from the duct. Loosen the top compression nut then pull the probe out when it becomes loose.
16. Remove the transitional duct Between the blower and the heater. Remove the six allen screws holding the duct to the blower, then loosen and remove the sanitary clamp at the heater. Remove the duct and set to the side. 
17. Loosen the nut on the second sanitary clamp, keep your hand under the element, remove the clamp and remove the heater from the roaster. 
18. Using new gaskets, install the new heater by reversing steps 11 and 10.
19. Plug heater into the solid state relays.
20. Reinstall the thermocouple.
21. Apply insulation and install silicone sleeves. Zip tie silicone sleeves.
22. Install the top plate.
23. Install the autoloader. Recalibrate the autoloader after reinstallation.
24. Test unit.