Read this guide all the way through before starting the work.
Tools required :
- T10 Screwdriver
- #1 Phillips Screwdriver
- #2 Phillips Screwdriver
- metric Allen key set
Process :
- Remove the Autoloader. See this guide.
- Remove the right and left panel of the roaster. Set aside.
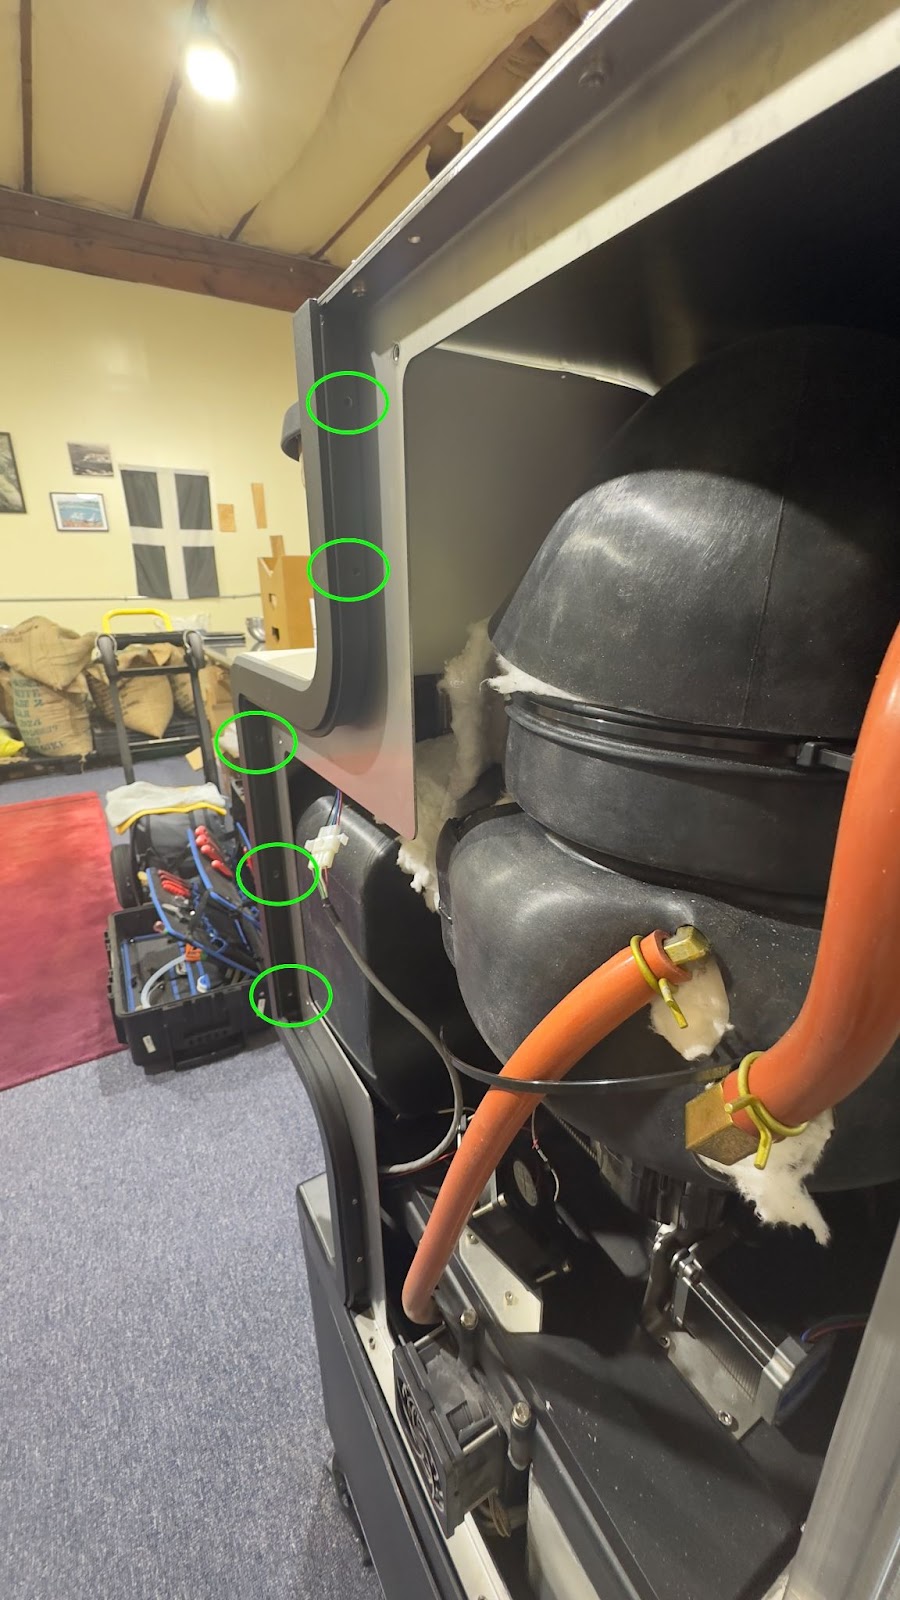
- Along the left side of the roaster remove the 5 Allen screws securing the front panel to the frame of the roaster.
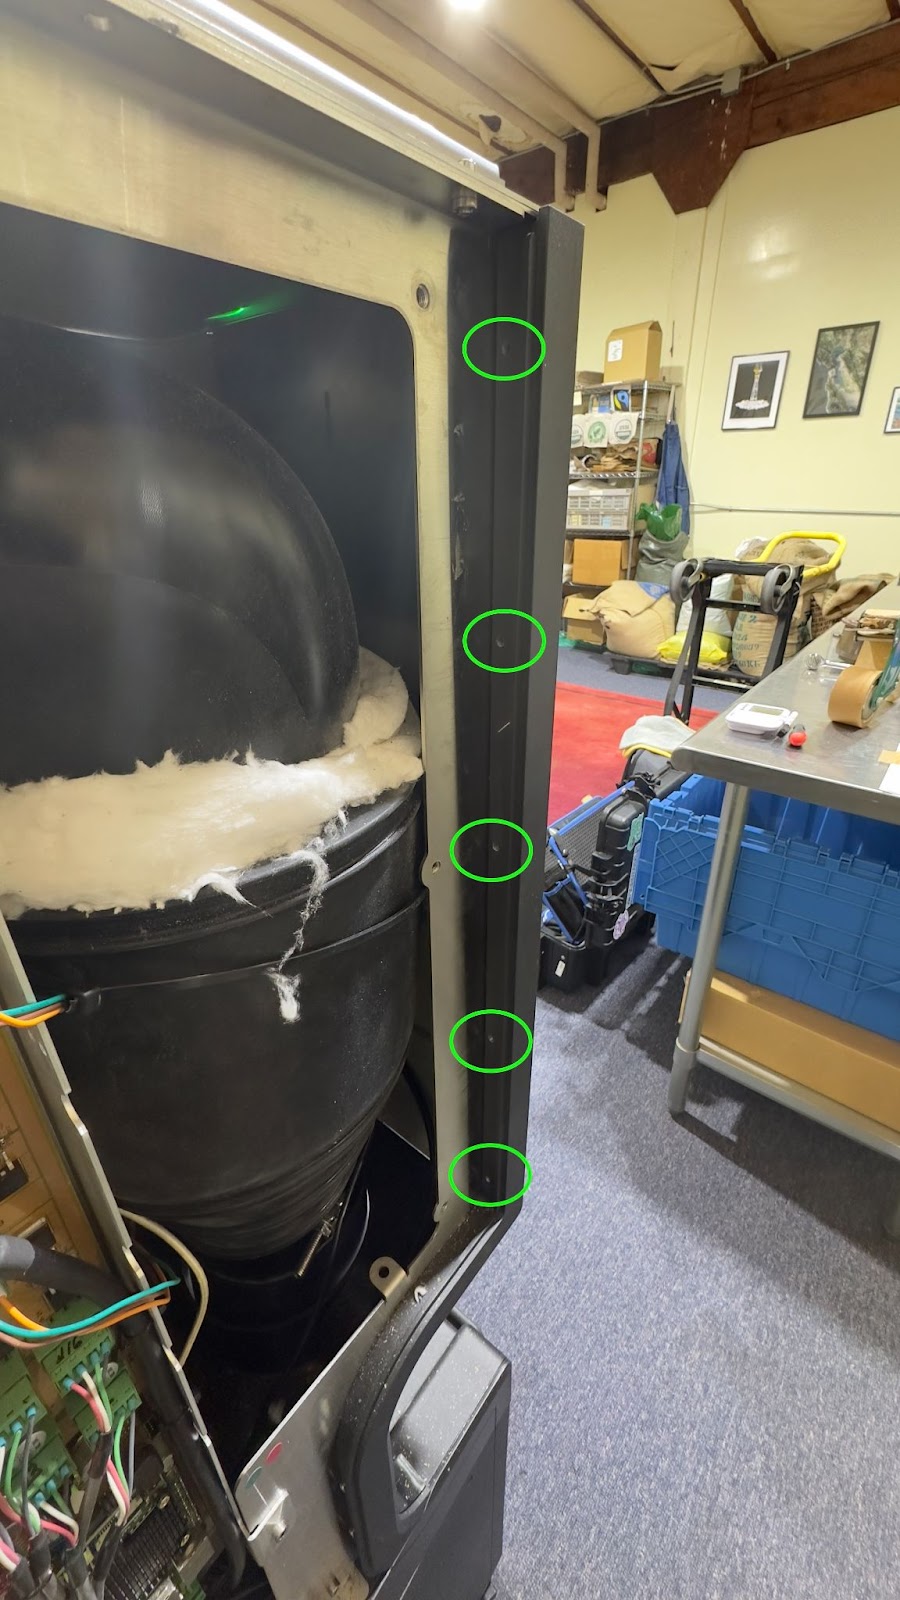
4. Along the right side of the roaster remove the 5 Allen screws securing the front panel to the frame of the roaster.
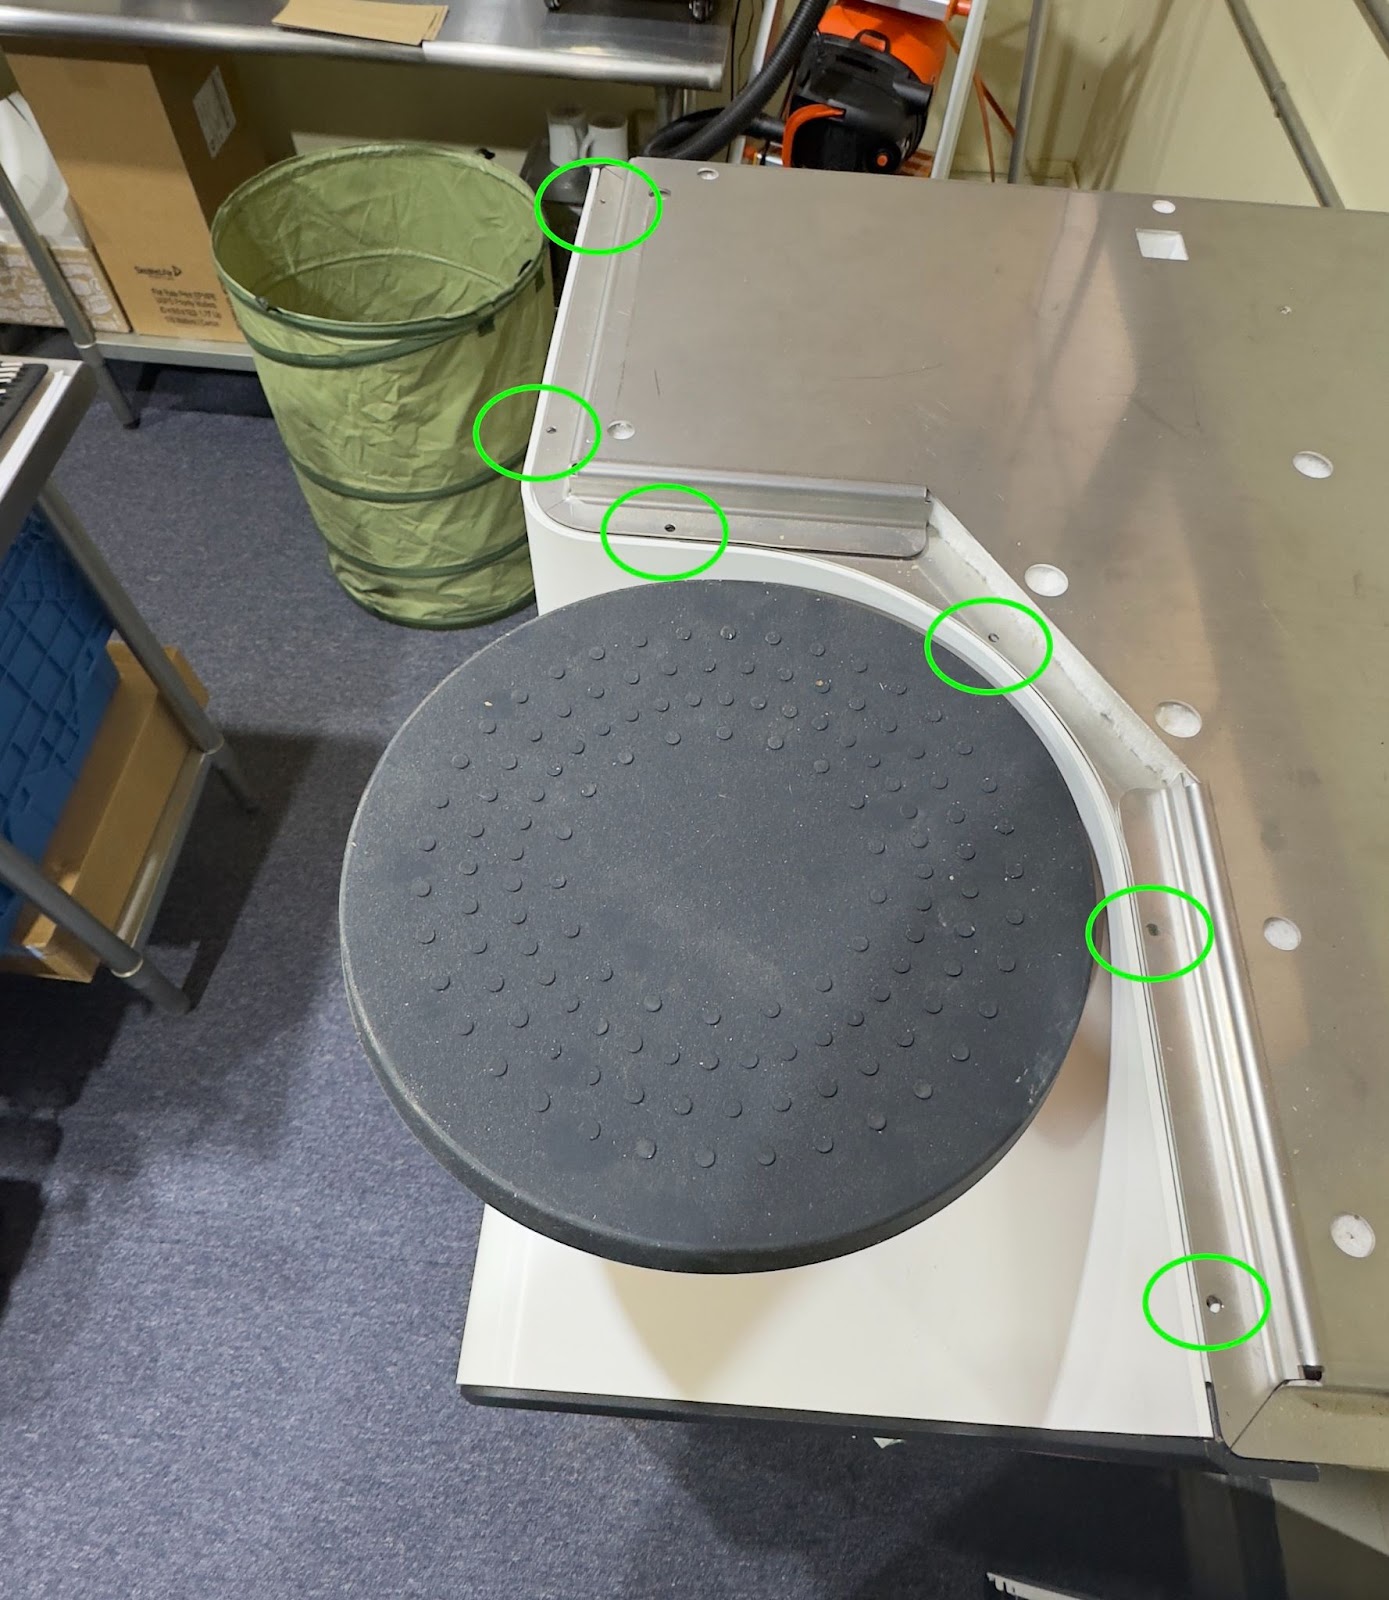
5. Remove the six screws along the top of the roaster. These are either T10 or a #1 phillips.
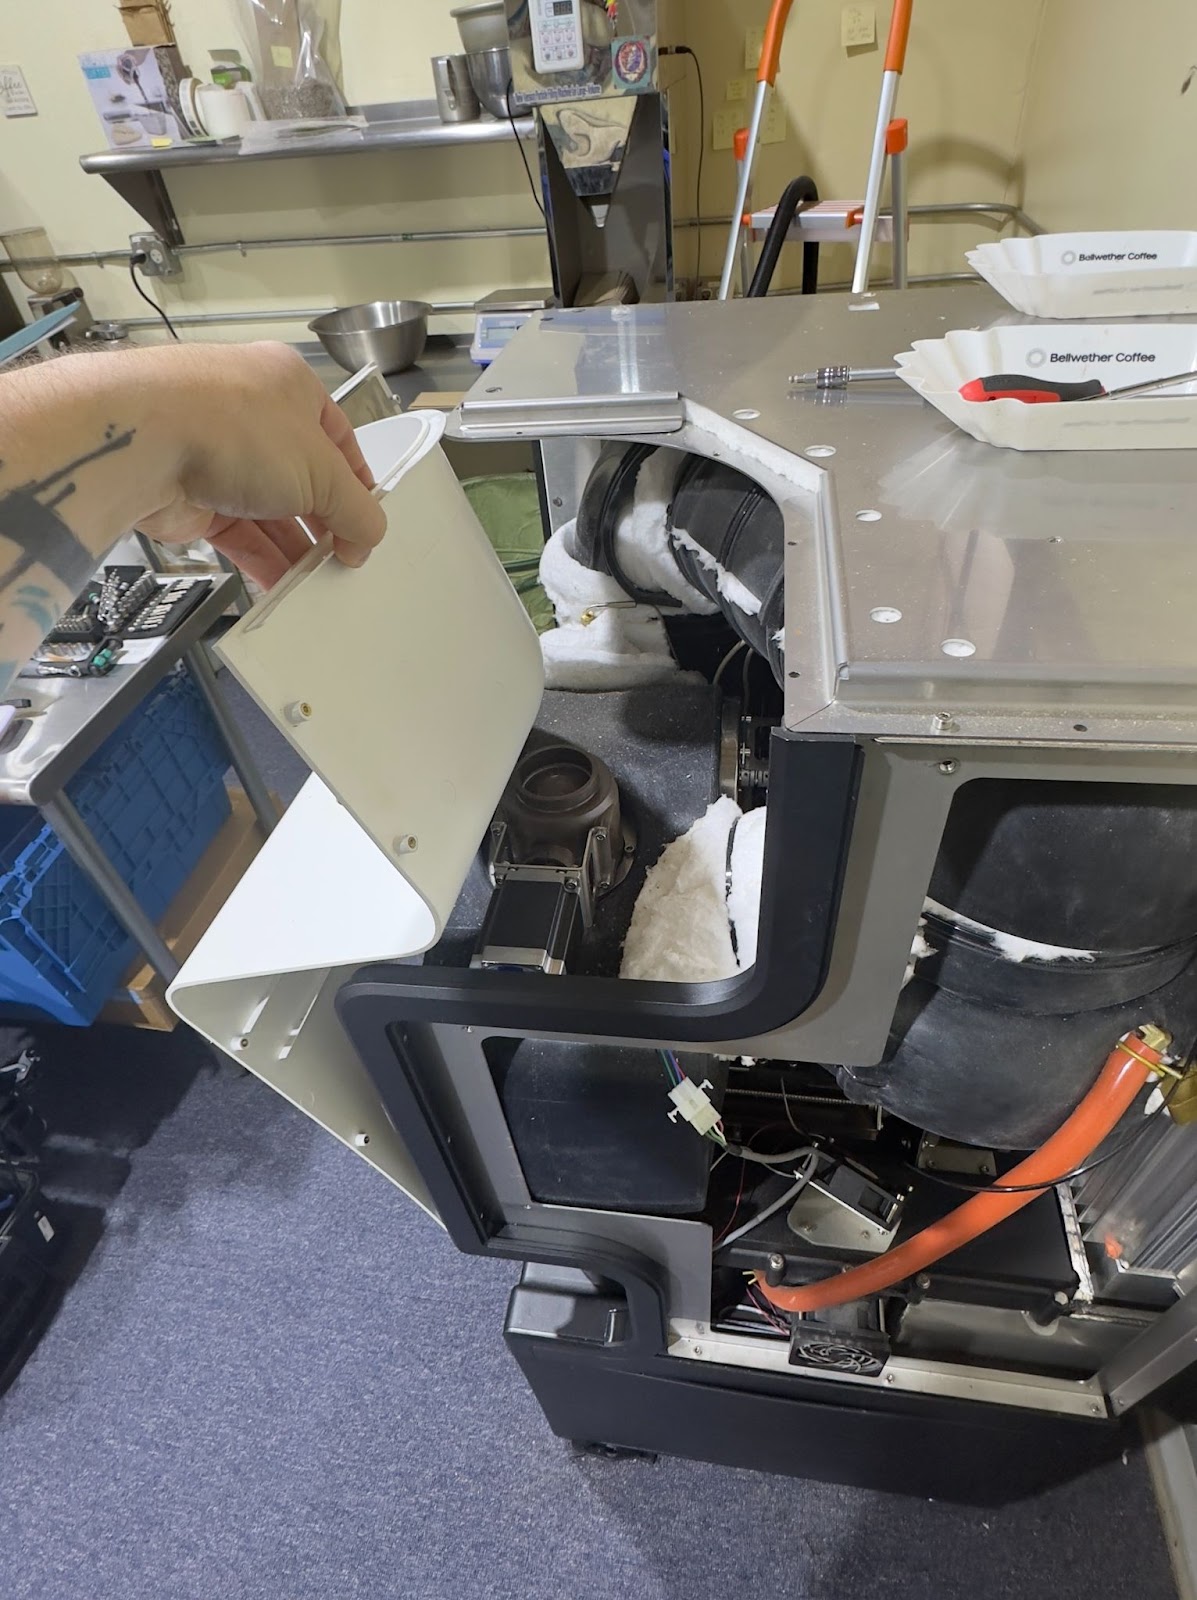
6. Pop the front panel free from under the lid and pull it forward. Use a chair to help support the front panel as it leans forward.
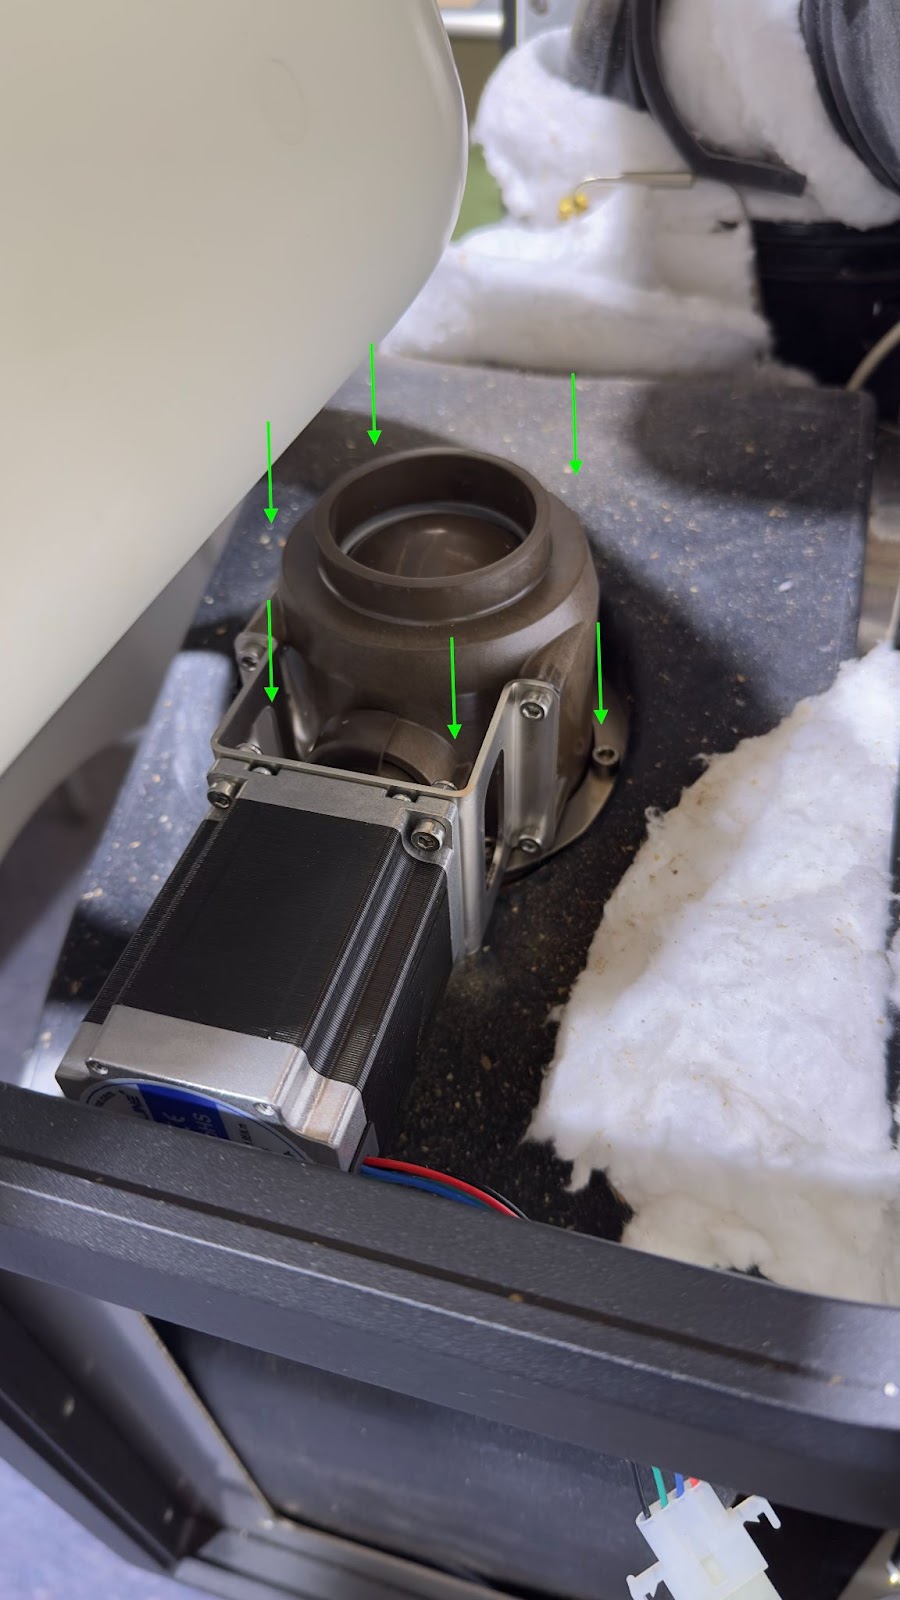
7. Remove the six Allen screws holding the bean load in place. Remove the Bean load and set aside. Support bottom of the bean load.
8. Remove the old gasket, scrape away any stuck material. Then install the new gasket. 
9. Reinstall the bean load. 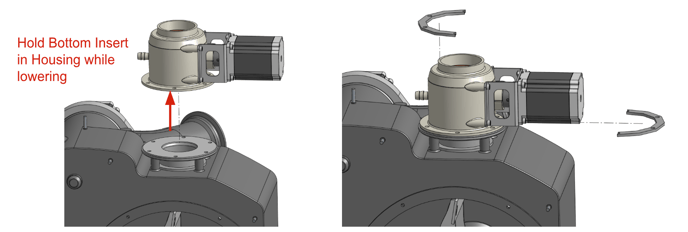
10. Put panels back in place. Reinstall the Autoloader. Test functions.
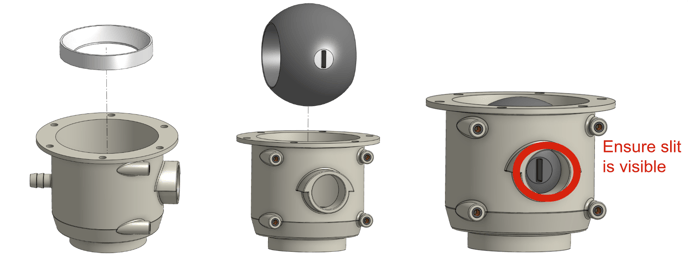
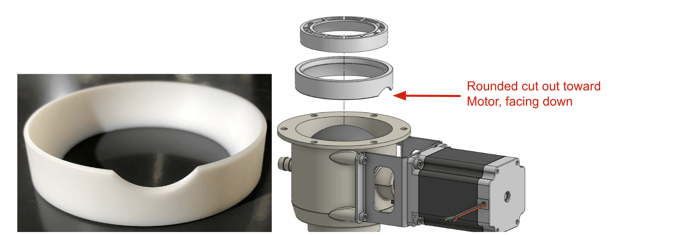
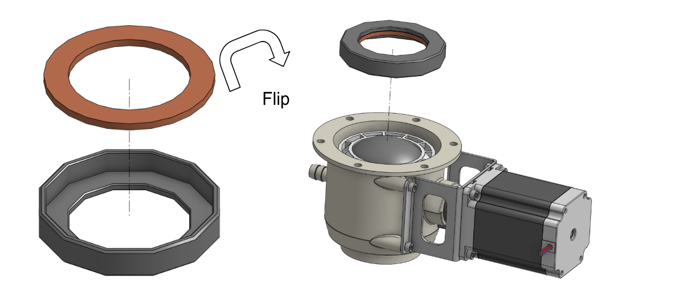
Bean Load Ball valve assembly needs to be supported from the bottom when being held upright. Below is how to reassemble if it falls apart.